


Creating your own DIY e-liquid flavors is both a creative hobby and a practical way to control your vaping experience. With the right ingredients and techniques, you can experiment with different tastes, strengths, and throat hits—tailored exactly to your preference.
Whether you’re aiming for a dessert-style vape, fruity punch, or a menthol blast, making custom e-liquids at home gives you full control. Plus, it can save money in the long run.
In this comprehensive guide, you’ll learn how to mix your own vape juice safely, what tools you’ll need, and how to balance flavor for the perfect hit.
Why DIY E-Liquid Flavors?
There are plenty of reasons vapers start crafting their own blends:
- Customization: Choose your nicotine strength, VG/PG ratio, and flavor profile.
- Cost Savings: Bulk ingredients are more affordable than store-bought juice.
- Control Over Ingredients: No unknown additives—just what you choose to include.
- Satisfaction: There’s something rewarding about creating a vape you genuinely enjoy.
Understanding the Basic Components of E-Liquid
Before you start mixing, it’s essential to understand what goes into an e-liquid. Each part plays a key role in how your vape performs and tastes.
Propylene Glycol (PG)
PG is a thin, flavor-carrying base that provides a stronger throat hit. It’s ideal for those who enjoy a cigarette-like feel.
Vegetable Glycerin (VG)
VG is thicker and produces denser clouds. It’s smoother on the throat and slightly sweet, which can influence the flavor profile.
Nicotine
Nicotine comes in various strengths. Always handle it with care—it’s a concentrated substance and should be measured precisely.
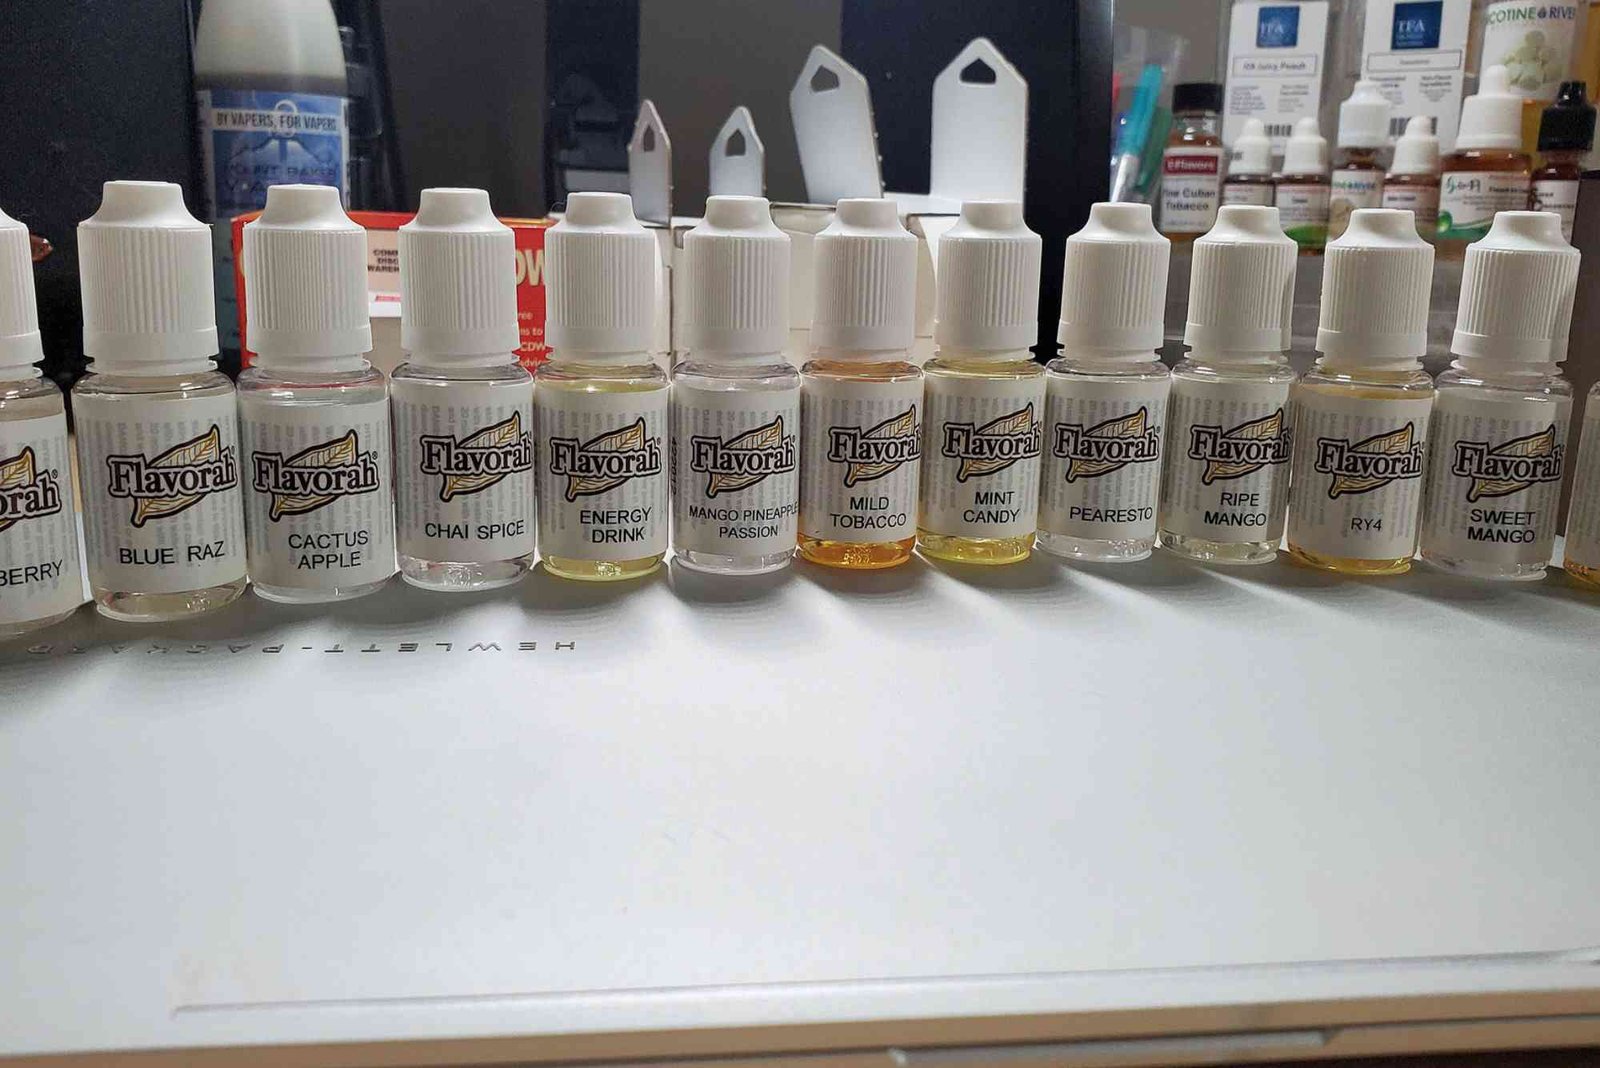
Flavor Concentrates
These food-grade flavors define your e-liquid’s taste. From blueberry cheesecake to icy mint, the options are endless.
Tools and Supplies You’ll Need
Mixing DIY e-liquid flavors doesn’t require a lab setup, but a few tools will help ensure accuracy and safety.
Syringes or Pipettes
Use these to measure out each component with precision, especially nicotine and flavors.
Empty Bottles
Store your custom blends in clean, labeled bottles. Dark glass helps preserve flavor and nicotine stability.
Gloves and Safety Gear
Nicotine is potent. Wear gloves and eye protection to prevent accidental exposure.
Digital Scale (Optional)
If you prefer weight-based mixing, a sensitive scale ensures accurate measurements without needing syringes.
Step-by-Step Guide to Making DIY E-Liquid Flavors
Let’s break down the process into easy, manageable steps.
Decide Your Recipe
Start simple. A single-flavor mix like vanilla or mango is great for beginners. Gradually add more complexity as you get comfortable.
Choose Your Ratios
A typical VG/PG ratio is 70/30 or 50/50. High VG means more clouds; high PG provides stronger flavor and throat hit.
Measure Your Ingredients
Be precise. Use syringes or a scale to measure each component:
- Base (VG/PG)
- Nicotine
- Flavor concentrates
Keep the total volume in mind. For example, to make 30ml of juice, calculate the exact proportions of each element.
Mix Thoroughly
Combine everything in a clean bottle. Shake well for a couple of minutes. The flavor may not peak immediately—this is where steeping comes in.
Steeping
Steeping allows flavors to blend and mature. Let your mix sit in a cool, dark place for a few days to a few weeks. Shake it daily. Fruity flavors steep faster; dessert or creamy blends may take longer.
Tips for Perfecting Your Flavor
Getting the best DIY e-liquid flavors involves trial and error, but these tips can help.
Start with Small Batches
Mixing 10ml at a time minimizes waste if a recipe doesn’t work out.
Record Your Recipes
Write down every measurement and step. If it turns out amazing, you’ll want to replicate it.
Don’t Overdo the Flavor
More flavoring doesn’t always mean better taste. Most concentrates work best between 5–15% of your mix.
Balance Sweet and Harsh Notes
Pair sweeter flavors (like custard or fruit) with earthy tones (like tobacco) to create depth and complexity.
Common Mistakes to Avoid
Even seasoned mixers run into issues. Here are a few pitfalls to watch for:
- Using too much flavor: Can overpower the blend and gunk up coils.
- Skipping steeping: Leads to harsh or underwhelming flavor.
- Inaccurate nicotine measuring: Can be dangerous. Always double-check calculations.
- Poor hygiene: Always sterilize tools and work in a clean space.
Safety Considerations
Safety is critical when handling nicotine and flavorings:
- Store nicotine out of reach of children and pets.
- Wear gloves and goggles during mixing.
- Work in a ventilated area.
- Label all bottles clearly to avoid confusion.
Flavor Combinations to Try
Once you’re confident with single-flavor mixes, get creative. Try combining:
- Strawberry + Banana + Cream
- Coffee + Vanilla + Hazelnut
- Menthol + Blueberry + Citrus
You can even emulate your favorite commercial juices through research and experimentation.
Is It Legal to Make Your Own E-Liquid?
In most regions, including the UAE, making e-liquid for personal use is legal. However, always check local regulations. Selling homemade vape juice without licensing is often prohibited.
FAQ: DIY E-Liquid Flavors
What do I need to make e-liquid at home?
You’ll need VG, PG, nicotine (if desired), flavor concentrates, syringes, bottles, and safety gear.
How long does it take to steep e-liquid?
It depends on the flavor. Fruit mixes may be ready in 2–3 days, while desserts could take 2–4 weeks.
Can I vape e-liquid right after mixing?
Technically yes, but steeping improves the taste. Freshly mixed juice often lacks depth.
How strong should my nicotine be?
Start low. 3mg or 6mg per ml is common for sub-ohm vaping. MTL users may prefer 12mg or higher.
Why does my DIY vape juice taste weird?
It could be due to too much flavor, incorrect steeping, or an unbalanced ratio. Start simple and adjust gradually.
Start Crafting Your Own Vape Experience
Making DIY e-liquid flavors at home is a rewarding process. It allows vapers to tailor every aspect of their experience, from flavor strength to vapor production. With a little practice, you’ll be creating blends that rival commercial options—at a fraction of the cost.
